
Propagate Changes
Overview
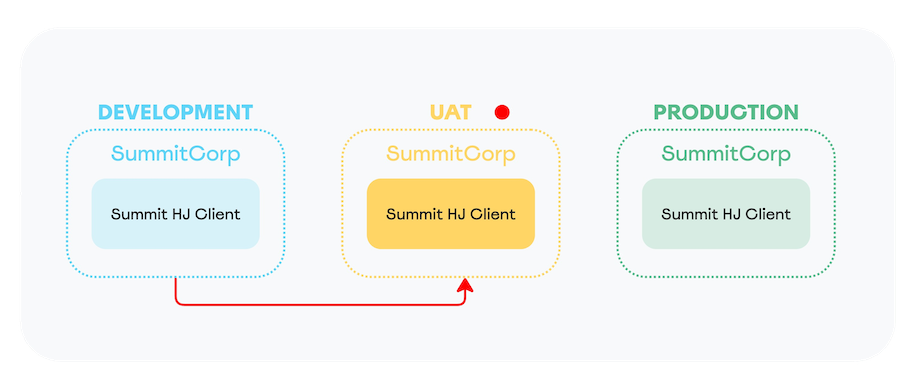
The Propagate Changes feature in Next Identity allows you to efficiently replicate configuration updates across environments — such as Development, UAT (Stage), and Production — ensuring consistency and reducing the risk of manual errors. This structured workflow is essential for managing configuration at scale, promoting safe deployment practices, and maintaining reliable system behavior across your environments.
Understanding Clients, Applications, and Environments
In Next Identity, clients are organized into applications, which represent the grouping of clients in all environments with the same configuration. Each application and its clients exist across multiple environments, such as:
Development (lowest environment)
Stage/UAT
Production
This architecture enables you to:
Make updates in a controlled environment (e.g., Development)
Test changes safely
Propagate updates to upper environments once validated
For example, a customer with three applications — each replicated across three environments — can test features in Development and promote them to Production in a streamlined and consistent manner.
Changes Implemented in Lower Environment (Development) that Need to be Propagated
How Propagation Works
You can only make changes in the lowest environment of your pipeline (usually Development). Once these changes are saved, you can propagate them to upper environments using a guided process. This helps avoid discrepancies and ensures changes are properly reviewed before reaching production.
Example
Let’s say you want to enable Two-Factor Authentication (2FA):
Enable 2FA in the Journey Builder for an application your Development environment.
Test the login flow using the Live Preview feature.
Once verified, start the propagation to the next environment (by default this is Production, but it may be different depending on your structure).
Step-by-Step: Propagate Changes Across Environments
After saving changes to a Journey in Development, if you visit the next environment tab in the journeys screen (in this case production) there will be a message signaling a difference between environments (ex "Journey Configuration Out of Sync").
Select the Review and Promote. You will be directed to a new page explaining the changes.
Note: there is also a "promote now" option that will skip the review process, it is always recommended to review your changes first.
Review the detected inconsistencies, along with expandable details for each. You will see the option to select all changes for promotion (recommended) or select only those changes you wish to promote now (only for advanced users).
Review the items carefully in the propagation summary window on the right of the screen. If everything looks correct, Optionally add a comment to document the change for audit purposes and select Execute propagation.
A confirmation modal appears, review once more and choose Execute propagation again if all looks correct.
If this is not the final environment, the process can be repeated. A message about inconsistencies will now appear in the next environment in the pipeline.
What Happens Next
Once propagation is complete:
The message about inconsistencies disappears from the updated environment.
Configuration is now aligned with the source environment.
The process can continue sequentially until all environments are updated.
Tip: Use comments during propagation to create a clear, auditable history of changes across environments.
Best Practices
Always test your changes using the Live Preview feature before propagation.
Use propagation to maintain consistency and prevent manual misconfigurations.
Coordinate with your team if multiple users are making concurrent updates across properties.